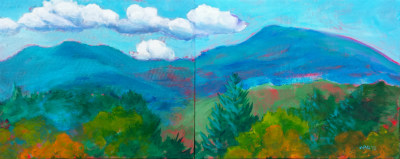
This latest commissioned acrylic on canvas of Mary’s Peak is helping fund my daughter’s trip to Greece to sing at a Choir Festival.
Corvallis Artist, Oregon Artist. Creating Every Day…paintings, web sites, and courses Oregon daily painter, murals and portraits. Corvallis Web Designer / Web Developer. Original abstract landscape oil paintings
This latest commissioned acrylic on canvas of Mary’s Peak is helping fund my daughter’s trip to Greece to sing at a Choir Festival.
 SOLD © Pam Van Londen 2010, Nest of Prosperity 9, 8×8 oil on claybord
 SOLD © Pam Van Londen 2010, Nest of Prosperity 10, 8×8 oil on claybord
It is that time of year when we want to see things growing, percolating, gestating. Let these nests encourage you to grow and prosper.
, 12x12 on acrylic on gallery-edged canvas") SOLD © Pam Van Londen 2010, Willamette River 28, 12×12 acrylic on gallery-edged canvas
SOLD © Pam Van Londen 2010, Willamette River 28, 12×12 acrylic on gallery-edged canvas
This painting was commissioned for a couple that floated the Willamette River years ago.
The technique here uses an alizarin crimson underpainting to keep the palette bright. Once dry, I layered thick and thin swirling and flat layers to build depth.
I’ve painted the edges of the canvas so the image wraps around it, allowing more view from the sides and top and bottom.

The Grace Center For Adult Day Services presents the 5th Annual Chef’s Jubilie on Sunday, September 18, 2011 at 5:00 to 8:00 PM at Grace Center for Adult Day Services located at 980 NW Spruce Ave. in Corvallis.
Tickets are $55/adult and 50/50 Raffle tickets are $5 each.
A silent auction features local artists and adventures. My Radishes painting will be auctioned.
 NFS © Pam Van Londen 2010, Heidrich Girls Surfing, 8×8 oil on claybord
To complete a set of beach pictures for the Heidrich Family.
![]()

$880 © Pam Van Londen 2010, Columbia Gorge From Rooster Rock of Beacon Rock 3, acrylic on 48×48 archival gallery-edged canvas.
This 4-foot square painting is done now and ready for your office or living room wall.
The image wraps around the 1.5-inch sides.
Shipping is $50 in the USA and $100 in Canada.
Last week I was commissioned to paint a previous plein air daily painting onto a larger panel. We settled 40×30 inches:

Then I could not stop…I had to paint it again, only 48×48. Which one will they choose?


SOLD © Pam Van Londen 2010, Randy Heidrich Surfing, 8×8 oil on claybord
Thank you for the surf lesson, Randy. Now you can hang this painting in the TV room next to the other two. We really enjoyed our family surfing lesson and hope to join you again next summer. Some of my family are getting new wet suits for Christmas!
Is Cape Kiwanda the best place for a lesson or should we try Beverly Beach?

SOLD © Pam Van Londen 2010, Johnson Creek 7, 18×24 acrylic
I’m hanging some work at the Albany Heartspring Wellness Center but they needed another piece for an exam room.
This image is based on a smaller daily painting done earlier this year. We’ll see how it looks on their deep orange wall.

Chuck and Jenny have their portrait now. Happy New Year!
This painting was completed from three reference photos taken while on vacation in August 2009.
I used acrylic on gallery-edged canvas.
Almost any subject makes a great gift for your loved ones, clients, and colleagues. Contact me to discuss your gift ideas.

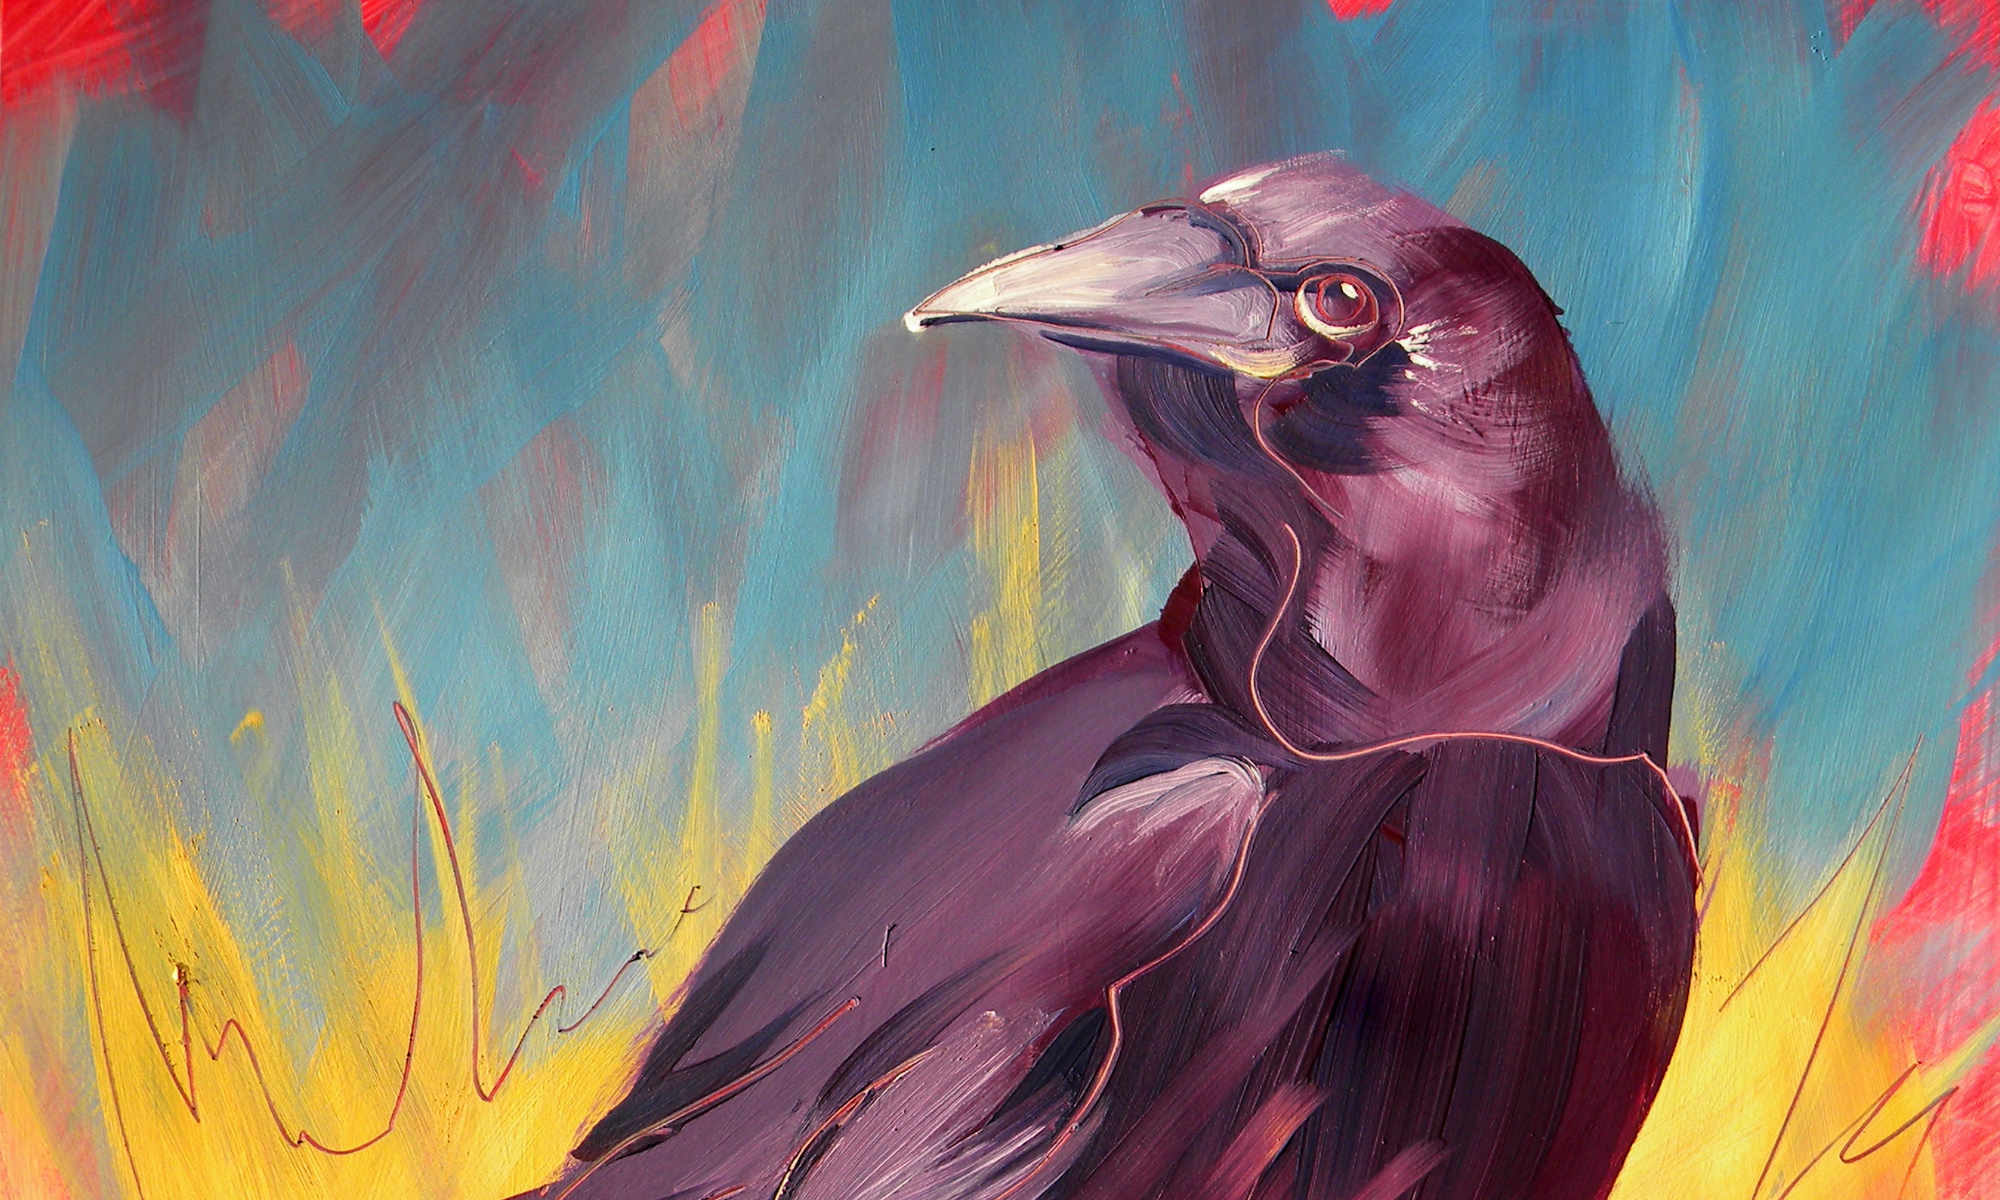
SOLD © Pam Van Londen 2009, Crows on the Beach 2, 8x8x1 on oil on gessobord
More for the bird series.
Any requests? Send me a photo or let me know what birds you like and I’ll paint them for you.
Sometimes I take photos of paintings as I’m painting them. See how three paintings looked at each major step.
If you are like me, you like to watch others paint. I will eventually have a video of me painting from beginning to end with time-lapse or perhaps narration. That seems like a big job but might be fun one day.

I’ve been designing and painting signs and sets for Bye Bye Birdie, which opens July 17 at Corvallis High School. Join us there at 7:30pm in the theatre.
It promises to be a laugh-filled evening.
The play runs July 17, 18, 23, 24 at 7:30pm and July 25 for a 1:30 matinee.
Buy tickets ahead of time from the Majestic Theater web site.
See the article in today’s Gazette-Times Entertainer. If you scroll down, you’ll see a slideshow link.

In anticipation of summer and dreaming of Provence, I have painted a commissioned work of sunflowers and poppies.
This work required a color scheme I often do not paint in, so I mixed the colors exactly before beginning. This method helped produced a work that is a bit different from my normal portrait or landscape. The warmer palette was a joy to paint with and seemed to keep my insides warm while working!
Delivering the painting and getting it hung in just the right spot was fun. It did indeed match the new table and wall colors. I am honored that it will hang next to children’s art.
Comment from the new owner:
“I have been enjoying one of Pam’s paintings hanging in my living room for a couple of years now. After giving my kitchen and dining nook a “makeover,” I decided I needed a piece of art to finish it off and bring in some color, and I had something very specific in mind. I took my ideas to Pam. She was a joy to work with, and took my thoughts about a theme and color palette and interpreted it with her own touch of whimsy to deliver a painting that is really just perfect for the light and the space. I am so happy with it!”
“The mural looks SO GOOD! and the continuation along the walls–did you get a BEFORE picture with the mailboxes there? I love the bit down by the Nursery also. There is so much color in the whole department–it is really gratifying to see the changes, and you have been a big part of that. Thanks for being so flexible with the various requests and multiple opinions about the mural!” –emailed to me by the Project Manager. (Thank you!)

For the past few months I’ve been working with the Religious Exploration staff at the UU Fellowship of Corvallis to add a mural to the RE wing. It’s had a dull entryway for many years which did not necessarily invoke love, caring, and community.


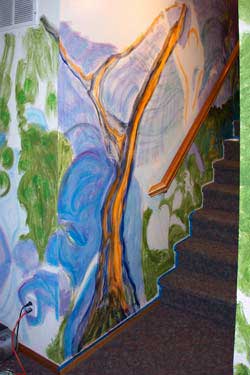
After a few meetings and draft concepts, we decided on the subject which includes a spacious landscape on a hill with a diverse group of babies, children, youth, teens, and an adult playing together around a white oak tree.
The tree will have a real wood stump in front of it to hold the Sunday morning challis.
The mural background extends to the front door and is repeated on the far wall way down the hall, which creates an environment, not just a pretty picture. New closets, lights, furniture, and curtains will tie the rest of the wing together.
A few more sessions of painting are needed to tidy up the figures, widen the trunk to fit the stump, finish painting oak leaves, and blend the backgrounds together.
By Labor Day, the mural will completed so the returning families can enjoy the surprise!
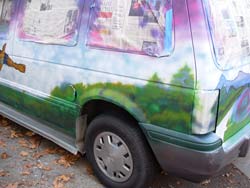
.") The Jackson Street Youth Shelter Art Car (van) is ready for the raffle. Buy raffle tickets to support the Shelter. Read all about the Art Car progress and the Shelter’s needs on their web site.
The Jackson Street Youth Shelter Art Car (van) is ready for the raffle. Buy raffle tickets to support the Shelter. Read all about the Art Car progress and the Shelter’s needs on their web site.
I’ve worked with the Jackson Street Youth Shelter between Summer 2006 and June 2007 to transform a Dodge Voyager van into an art car.
Introduction and Inspiration I was approached by the shelter’s director in the summer of 2006 to transform a donated van into an art car in the hopes of raffling it off to raise funds for the shelter. “Of course!” I said. It had been my plan to transform my motorhome into an art car, but hesitated due to my lack of experience. This van provided me a surface on which to experiment.
 On my travels around the country in 2005-06, I met a women who shared photos of her art car, which she decorates with LED and florescent lights inside and out. I had not heard of cars as art, per se, but had seen many kinetic sculptures at da Vinci Days festival in Corvallis. The artist mentioned the Burning Man Festival and encouraged me to attend next year. The festival’s online gallery showcases both cars and kinetic sculptures.
I am also inspired by BMW’s gallery of art cars painted by famous artists. My favorite is Esther Mahlangu’s 525i from 1991. I’ve always admired the Ndebele women’s home murals, and now there is one on a car!
For ongoing inspiration and how-to knowledge, I look to the Art Cars in Cyberspace site.
 Process, tools, and techniques
We held a few meetings with staff and residents of the shelter to inspire ideas and discuss logistics. A sheltered painting bay would have been ideal, but one did not became available until late November. Residents/staff agreed to sand and prime the van and leave the painting to me. I designed a simple scene with a man and women flying in the dawn above the sea and fields, with these words to be added at the end: “Let me breath and soar; just let me breath and soar.” [We left out the words due to space constraints.]
After 9 months the van painting is complete. Technical difficulties, my schedule, and the cold, rainy weather held up the progress but warm weather and new energy helped us get it done.
Masking, sanding, and spray priming was completed before I drew the design onto the van. The use of face masks is essential when sanding, as the tiny paint chips are bad for the lungs.
The pencil does show through thinner areas and may need a second coat. Though some artists do leave their under-drawing visible to add texture. I tend to like this effect, but am not sure how well it will be received on a car.  painting progress.") I purchased small hobby-sized enamel paint for the airbrush, along with a thinner and cleaner. These colors were rich and metallic and expensive. Next time I paint an art car, I will start with the larger, areas and work into the detail. Since I had not airbrushed anything important before, I decided to start with some detail…my first sprays of paint were to form the male figure.
I purchased small hobby-sized enamel paint for the airbrush, along with a thinner and cleaner. These colors were rich and metallic and expensive. Next time I paint an art car, I will start with the larger, areas and work into the detail. Since I had not airbrushed anything important before, I decided to start with some detail…my first sprays of paint were to form the male figure.
My airbrush did well enough and this practice area, I knew, would be spayed over again as I improved my touch, angle, and timing.
I’ve been using a Paasche double-action airbrush and compressor. The airbrush is difficult to clean but must be done well before any paint will come out of the tip. I do not enjoy this part of the process and often spend too much time fiddling with it. But once I get going, the painting is fast and fun. I have a tendency to want to spray like I paint…with a bit of spontenaity. I must mask off areas first, however, or risk wasting expensive paint and ruining decent work. To mask, I used mostly the blue painters masking tape, in a wide width. This can be supplemented with newspaper to help cover larger areas. Now, this is not the proper way to mask; most airbrush artists use masking film or stencil material and cut exactly with knives. I am too lazy and prefer quick tape jobs.
To define edges, I wrote around general and detail areas with black, orange, and blue Sharpie permanent markers. These areas seem to be permanent until I spray a clear coat on top, though. If I do not spray too close to the surface, the colors don’t run enough to matter.  Much of the front has been resanded and may need to be cleaned with denatured alcohol to clean whatever is keeping paint from adhering. Not a great loss; the design was a bit flawed, so it’ll be ok to start again. One of the cans of white has caused problems with running; it takes all the underlying paint color off as it runs down over the detail work. Ugh. If I had marked that can or thrown it away, then
I wouldn’t have done this twice. We purchased a higher-quality, more opaque paint and it worked! It covered the flaws with a much more opaque layer.
Conclusion
It is a worthwhile endeavor and I’ll probably do it again. Murals, whether on cars or on walls, are a big commitment and weigh on my mind when I cannot be working on them. Practice is important, along with improving my knowledge of the tools, surfaces, and media to work with. I plan on buying only the best paint next time, which will save time and cover the surface better.
Because of time constraints, the next art car must be done with more help. I enlisted my daughter to help draw detail on the skirt of the women flying. And I enlisted sanding and priming from the director and her staff. But I envision a project where many are painting at one time. Will I be able to work with more activity going on? Will others? I’m interested in trying it!

Levien residence, Corvallis, Oregon.
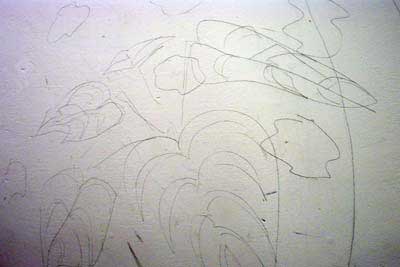
Scroll down to view Day 1 to 16, or jump to the end and scroll up.
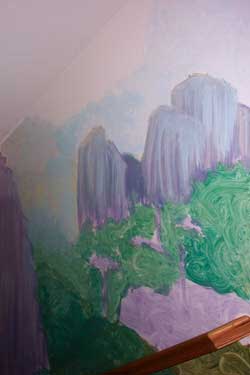
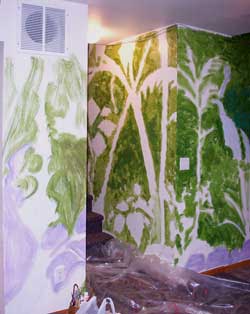
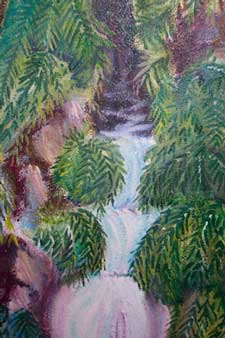
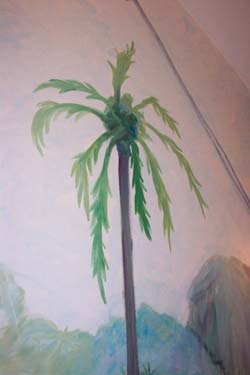
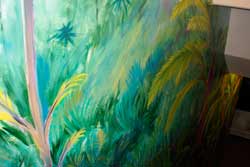
The entire design is sketched in pencil on all four walls. These lines will be obscured and drawn again as the paint covers. Short and tall plants and trees will be layered in front of the waterfall and monoliths.
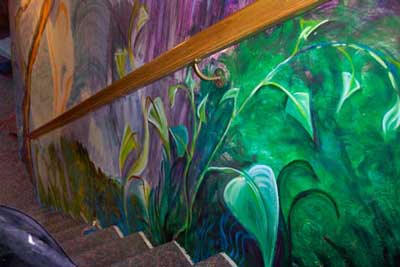
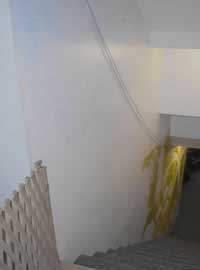 The first blocks of mid tone greens are added. At the top of the stairs a light sky is added as far as I could reach. The wires will become vines in various shades of green (unless someone moves them to a new location). Sky is added to the top sections. It’s hard to reach the top area without scaffolding. I enlisted Kyle’s help for the East side.
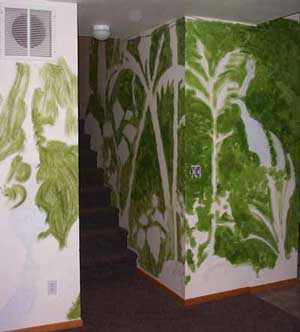
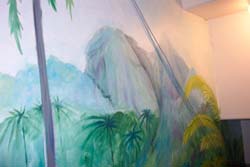
 More mid-tone greens are applied, as well as a bit more sky, cool rocks, and mist above the canopy. The cave begins to show in a cool blue.
Up to this point all color has been laid down with a large natural sponge, allowing transparency. At least one more layer of green and cool blues and purples will be laid down with a sponge before brushing begins. The sponge texture is currently swirls and straight wipes, which may show through the last layers to add texture and interest.
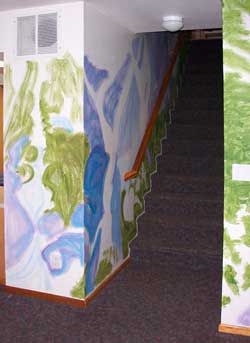
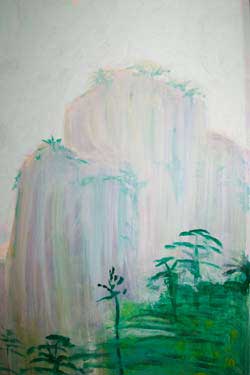
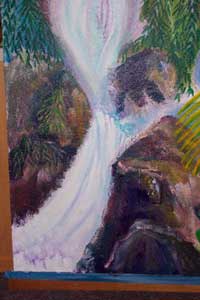
I was craving detail, so I improved the monoliths with trees and more mist. Then added foliage to the middle and foreground on just one wall. Still need to get the ladder to finish the sky and tops of the waterfall and cave scenes.
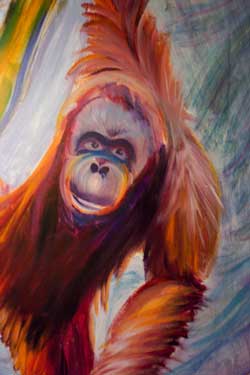
I refined the Day 4 foliage and added more to the foreground. I began to work on the orangutan and the tree she’s hanging in. There is much more contrast and a feeling of cool shade down below and warmth at the top near the cliff. I’m finally using masking tape to finish off edges and make less mess.
The orangutan is beginning to show herself hanging from the tree.
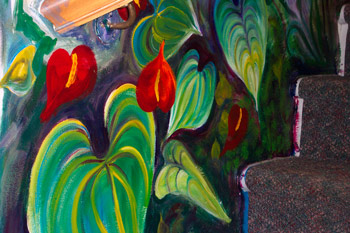
The lively flowers and leaves are brightening up the foreground below the hand rail.
This is Marca (femine for Marco), named by Quincy, the youngest Levien. Her hands and feet are not done, but the face and body are. She’s got a friendly gaze.
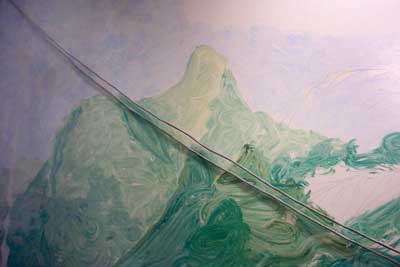
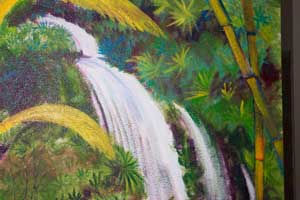
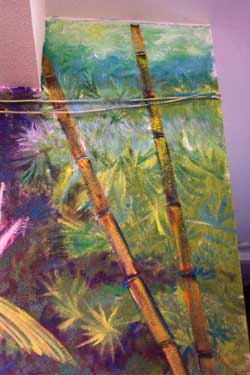
 I’ve officially lost track of the days, so this is a guess. It took 2 or 3 days to get the bamboo and waterfall completed. And on day 11 I decided the middle waterfall needed help, so I’m revising.
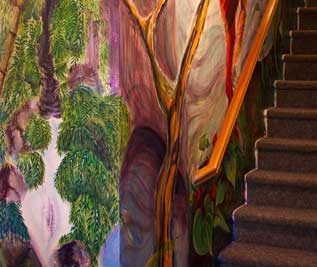
The cave recedes behind the tree.
I added giant bamboo stalks and foam to the bottom of the fall. These touches add depth. The crack in the rock where the stream falls now recedes into the distance.
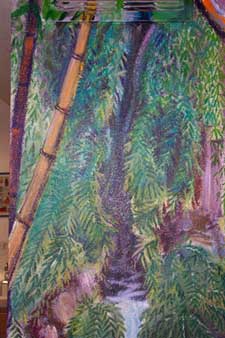
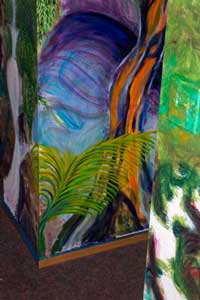
I washed this corner fern off three times and may do it again!
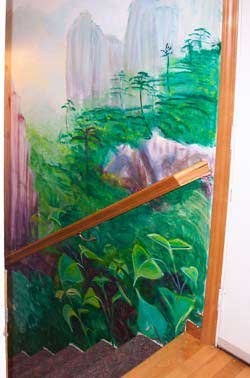
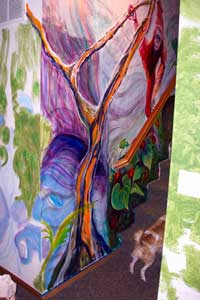
I’m finally able to work on the other wall, now and like how the composition is holding up.

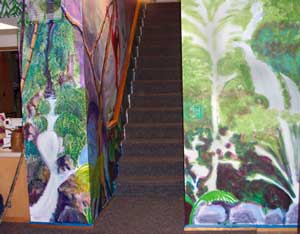 There’s an environment evolving downstairs!
I refined the details of the right falls, middle, back, and some foreground. Played around with the left falls again to improve the middle fall.

I added detail to the bottom right panel and began to climb the wall, so to speak, on the inside right panel.
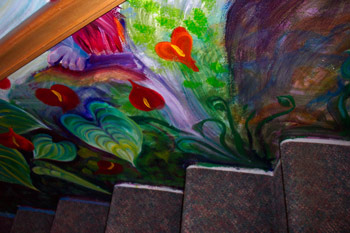
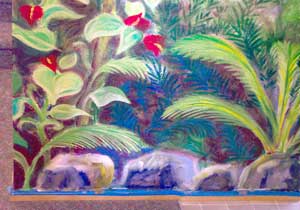
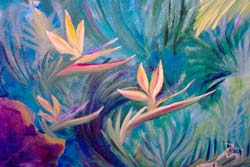
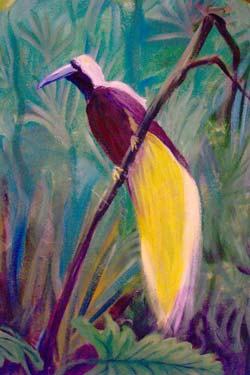
Now we’re getting somewhere! I’m continuing the background textures up around the right panel and adding more red flowers. It’s time for the banana trees and bird of paradise flowers. I’ve got five more days of vacation, will I run off to the beach, or stay and paint?

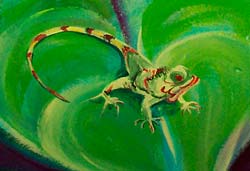
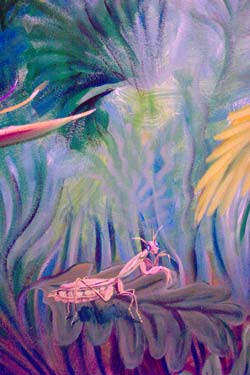
I’m finally able to resume painting and am nearing completion. The high foreground is coming together and the low foreground backdrop has been laid. The atmosphere is hazy above the canopy and dark and cool underneath, amongst the birds and lizards.
After taking at least 2 weeks off from painting, I saw the last work with new eyes. Either I’m attached to it, or it looked just fine. So I began to add birds, bugs, and lizards.

My first mural was painted at the home of Cindy Miller in Corvallis, Oregon during a peaceful snowstorm over Winter break. The 14-foot wall was white reflected too much sunlight in the large room, so I provided a cooler atmosphere by painting this old growth forest scene from a photo taken while we were walking along the path at Tryon Park in Lake Oswego, Oregon.